Description
"BADGER" - Outboard modified dory, wood. 15' 1" LOA, 4' 3" beam. 275 Ibs. Plans include original article from Sports Afield Boatbuilding Annual, lines, offsets, profile, construction drawings, and suggested bill of materials.
No small vessel can top the Gloucester dory as a boat able to take punishment and ask for more. But a true dory is the world's crankiest boat. Badger has all the dory's virtues of sea kindliness and husky charm, yet she'll be easy to power and maneuver.

Badger is a modified dory suitable for the lower-powered motors. As seaworthy as the wave tops thernselves, she is comfortable as an old shoe. She has enough lumber in her to last under hard service for a long time. A better all-around camp boat couldn't be built.
She is 15 feet 1 inch overall, by 4 feet 3 inches beam. She weighs dry about 275 pounds, so is not a boat you can carry on the car top. At present prices, depending somewhat upon locality, $75 should build her. (Editors note: Remember this was written long ago!)
She'll require a goodly space in which to be built and this space must be dry, because rain will swell and readjust her slats until you'll scream at patching up her bevels. All boats are like this. They must be put together dry. If your garage or basement isn't big enough to accommodate her, build a lean-to to shelter the work. Since there are only ten boards in her hull, she builds easily and no hot bending is needed.
The dory type is well known in Eastern coastal waters. Usually these boats are slab sided, narrow sterned and are built so as to "nest": that is, the thwarts are stowed in the bottom, and one dory goes into another. By this means deck loads of these boats are carried to the Grand Banks, where they are used far offshore by the fishermen handling codfish.
Such boats are seagoers. but the pure dory design is cranky and requires able handling by men who know how.
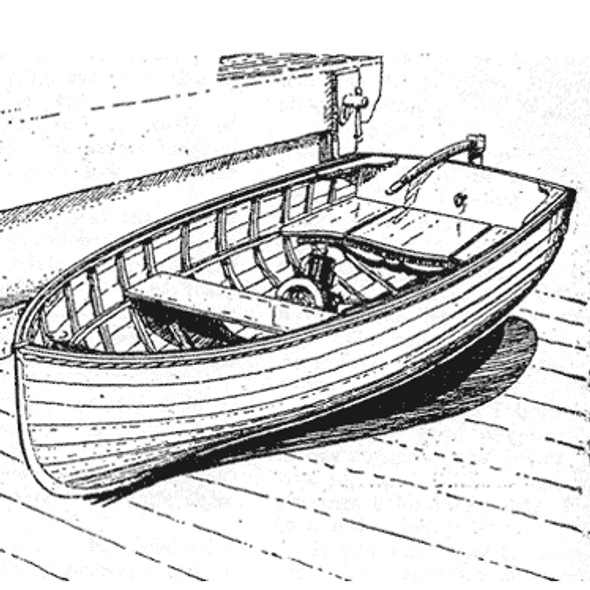
By modifying the type, widening the bottom and giving the stem end some bearing, the dory is made into a docile craft for small outboards. Badger, shown in the opening photograph. and in the drawings here, has proved fast with small power because her waterline is narrow with a light load. As she goes down in the water, these waterlines widen and she becomes quite stiff. The more you load her, the more stable she gets.
I have used the boat shown in the photo tor a long time; I have had her out in anything Lake Superior could throw. I have hauled rocks for the crib of my dock until her wales had only an inch of freeboard. She is shown after one such trip on a calm day resting placidly at the end of my dock. Just enough rocks have been left aboard to tip her and show her shape. The photo was shot from the window of my design office, right over the drawing board on which her drawings were made.

The first thing to do in building any boat is to lay down her lines full size. Use either brown butcher paper taped to the floor, or, much better, a couple of panels of cheap plywood, size 4', 8' and 1/4" thick for this. These, laid end to end, serve as a record for the bevels and stem and frames. It is much better to use this plywood "lofting floor."
On the floor you strike a line near the top, to represent the dotted line shown on the lines profile drawing. This line represents the building floor, A distance of 31" away strike a parallel line. This represents the waterline, and it is from this line that the dimensions for the rocker in her bottom are given. Another line elsewhere below will serve as a centerline for the half-breadths measurements.
Using a pine batten about 1" x 1" and 16 feet long, reproduce the lines profile drawing as close to the measurements as your batten will come. This, then. gives you a full-sized lines profile drawing to the outside of the planking. On this drawing, and at this time, you draw in also the outline of the expanded transom and the outline of the oak stem piece, shown on the Sectional View of Stem, Keel Boards and Transom. Later, you can pick off these patterns on thin plywood to use in cutting your actual transom and stem.
Next, sweep in the half-breadth plan. Carry along with this the fore body and the aft body plan, noting that the point of reference is to the outside, under edge of the planking lap. This planking is 1/2" thick of cedar, juniper or white pine. Red cedar is not recommended because unless it is in strips, it is too brittle to lap well and won't hold fastenings.
The lap line is thus established from the profile plan, the half-breadth plan and the point of reference for the lap is put on the body plan. Now you must determine the inboard point for the jog in the frame, or the change in frame angle. This is done by subtracting the planking thickness.
When you have the fore and aft body plans "gee'd" up, inscribe a line inboard 1/2" to make the actual frame line. In other words, you subtract the planking thickness. When the face of each frame has been marked, then outline the final frame pattern 2-1/2" inboard of this, sweeping the chine portion or heel of the frame across the bottom.
As shown in the drawing, these frames are three in number, 1" x 2-1/2" white oak. and are joined at the chine heel. A good way, in fact the best, for this boat, is to put a saw cut 3/8" wide in these heels, and insert a gusset of 3/8" waterproof plywood. Using waterproof glue, the frame can be glued up right on the body plan, first placing a piece of waxed paper under the joint to catch drip. When set. the joint can be riveted. The complete frame then can be beveled from the actual frame line without having to make allowance for fore and aft movement as when top and bottom frame are handclasped at the chine.
The stem is of 1-3/4" white oak, molded as shown. The transom may be of 1-3/4" fir or oak or vellow pine, even cypress. It should be feathered at the joint.
Bear in mind that the projected transom on the body plan is not the transom to build. You must expand the transom along the raked depth. This will give you the true beveled shape for the piece.
Patterns for the stem and transom are made. and these pieces got out. Next, cleat up the bottom keel boards. These must be a full 1" thick to properly bevel and to take fastenings. The two center boards are 7-1/2" wide. The wing boards may he left until cleated, and the width to ''come." Cypress, oak, yellow pine will make good bottom boards. Yellow pine is perhaps the most available. The cleats are of yellow pine, marked "intermediate ties" on the half-under view of the bottom.
Now lay out the centerline of the boat and the frame station on your shop floor, and erect the frames: then bend down the keel board and secure with bronze or galvanized screws through the keel boards into the frames. Use about 2-1/2"' No. 12 screws. Bronze is to be preferred.
Brace the works up to suit, and then make a template for the chine planks. These are of 1/2" material, and should be fastened starting at the transom and working forward, having first ascertained the shape. Allow a little over along the chine for trimming, and do not bevel for knuckle No. I until the plank is fastened. It is easier to bevel the edge true this way, working right from the frame. The overlap will be about 1", as the sectional sketch above the lines' half breadth shows.
A good device for horsing home the planks at the stem is shown in one of the sketches. Triangular pieces are temporarily screwed back of the landing portion, and clamps can then be used to bring the plank up to the stem bevel. Use 1" screws No. 8 on 1-1/2" centers for the stem fastening. The hood ends are trimmed off and a 3/4" oak batten is bent around as a stem band.
The laps in the seams of the planks are clout-nailed, using 1" copper clouts, or rivets may be used. About 2"' centers is right. Marine supply stores carry them.
Removable slat floors go over the inboard cleats.
These may be of 3/4" x 4" pine or other light wood. They should be spaced about 3/8" between slats, and be tied across underneath with 1" or 2'" crosspieces screwed to the slates from underside. Each of these floor slat sections is a unit between the main frames and is hence removable for cleaning out sand and debris. You will find that these floor slats are more than worth the trouble it takes to build them as without them bilge water and sand will always be wetting your feet. The thwarts had best be made of 1-1/8" x 12" material, screwed to the riser at the height shown on the blueprint. The riser is 3/4" x 2'", white oak.
Painting and general finish is the same as for any boat. Buff interior, white outboard is fine.
WESTON FARMER


